
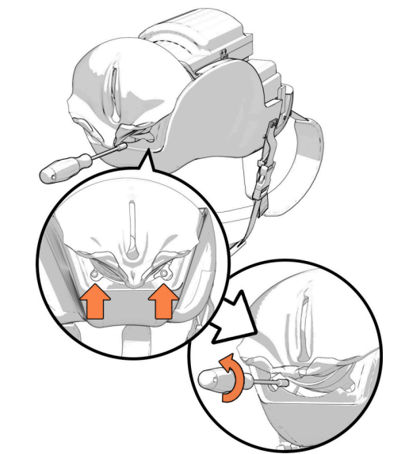
Step 1: Unscrew two screws at the bottom of the genitalia by lifting the bottom skin flap of the genitalia and inserting the screwdriver until you hit the screw. Unscrew until you feel resistance.
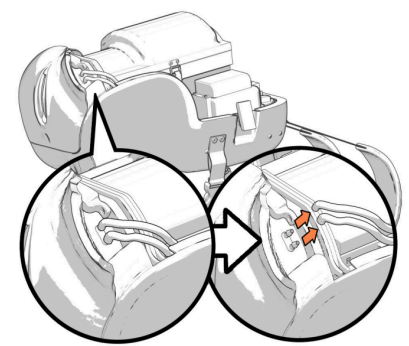
Step 2: Disconnect the two tubes that are going into the top of the genitalia.
Step 3: Pull up on the genitalia and cervix to remove.
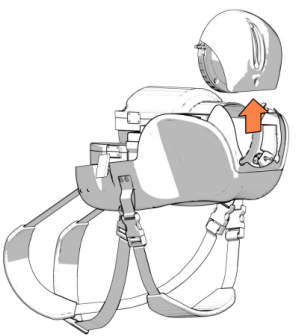 Step 4: Switch out the old genitalia for the new genitalia.
Step 5: Align the notches on the front of the cervix with the notches on the back of the genitalia.
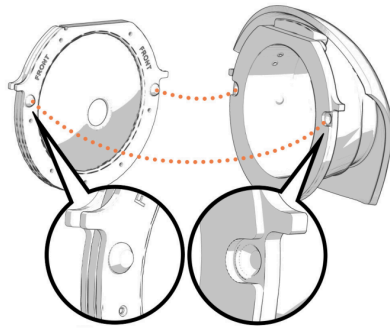
Step 6: The side protrusions should also match between the genitalia and cervix.
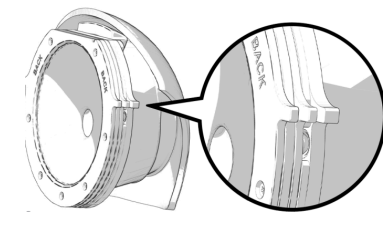 Step 7: The side protrusions should lay on the edge of the baby tube. If the cervix and genitalia do not slide into the slot easily, loosen the 2 front screws more.
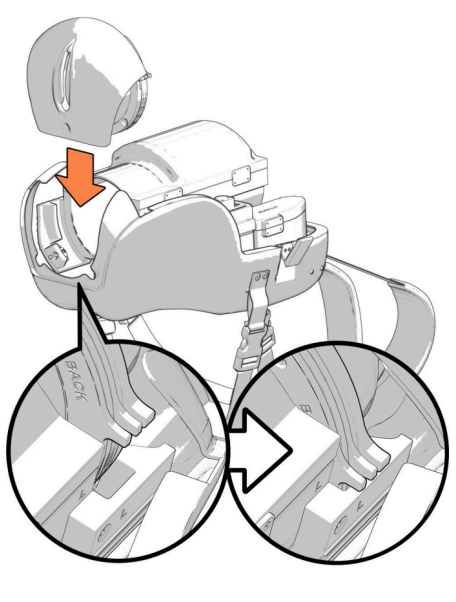 Step 8: Tighten the first screw until you feel resistance, then tighten the second screw all the way, then go back to tighten the first screw the remaining way to ensure alignment.
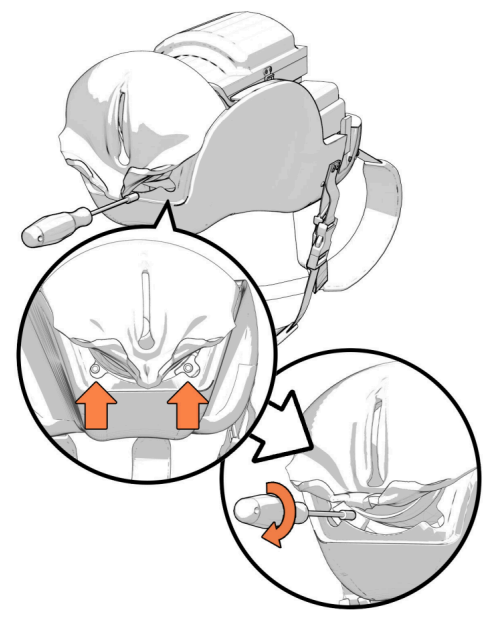
Step 9: Pull up on the genitalia to make sure it is in place and secure. Attach fluidics tubes back to genitalia. It does not matter which tube attaches to which connector. You can use some lubricant if you have any issues connecting the tubes to the connectors.
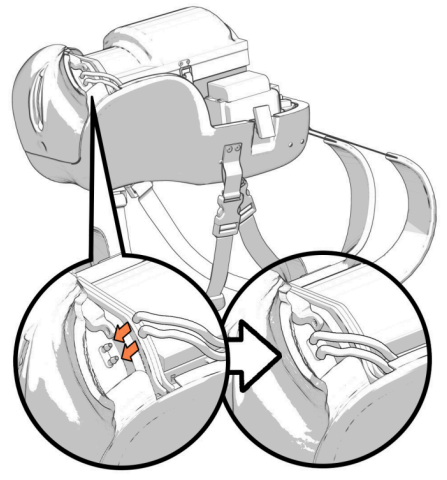
And now you're ready for simulation!